Posts

Red Chair Lecture at Russell Farm

Image
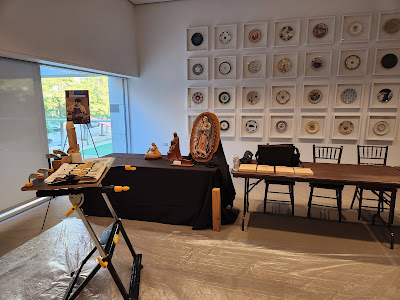
  Russell Farm Art Center in Burleson, Texas invited me to present as part of their Red Chair Lecture Series . The team at Russell Farm was very thoughtful with the setup, decorations, and refreshments. I especially liked how the stage was set up. We were blessed with an interested and engaged audience in the old hay barn which is now lit up with festive lighting. The presentation covered a variety of wood carving topics including history, tools, techniques, and the value of art created in wood. The audience asked a number of great questions during the presentation and we continued the conversation over refreshments. After everyone had a chance to get something to eat and drink, we moved to the Charlie Boren art studio. Charlie's carving studio has been preserved and is still used for some events. We spent some time there discussing tools and teaching wood carving. In the same building as the carving studio, there is an exhibit of Charlie Boren's wood carving. Charlie was know

Hand Made Wooden Banjo

Image
  Jody Webb brought a banjo he made to class. All the parts are custom made down to the hand carved tuning pegs. In addition to making such a beautiful instrument, Jody serenaded us during class.        

Poseidon - Shaping Things Up

Image
 Shaping things up on the Poseidon carving. We are getting close to refinement and details.

Poseidon Rough Out Continued

Image
  A quick updated on the Poseidon carving. Continuing to rough out the face and surrounding forms.      

Late Nights at the DMA

Image
  The Dallas Museum of art invited me to present at last Friday night's "Late Nights" event. The event celebrated the start of Hispanic Heritage Month and the life and work of Mexican American artist Octavio MedellĂ­n. During the evening, I had the opportunity to demonstrate carving, answer questions, and allow visitors to try their hand at carving. It was such a fun, full time, that I only managed to get photos before and after the event. Here is a photo of the demo setup in the Founder's room just prior to the event. Looks like the DMA managed to take some pictures, such as this photo found on this Facebook post .

Starting Poseidon Rough Out

Image
  The fun begins. Creating lots of wood chip as we start to go from wood slabs towards carved form. Here the wind areas on either side of the face are getting pushed back. With all this wood being cut away, it would be a shame for it to go to waste. The solution? Mulch. This way the wood can return to the earth and help the garden grow without raising land fills. So, here we are so far. You can start to see the forms taking shape.

Poseidon Glue Up

Image
  Gluing the Poseidon face and wind to get enough depth for the carving. After measuring the right alignment a few times, I apply Titebond glue and hold the layers in place with a couple of clamps. Once pressure is applied, the layers may want to slide a little bit out of place. To help prevent this, I put in a couple of screws to keep it from slipping. The screws are placed in spots that will be carved down low enough that the holes will disappear. Once the placement is secure, we need lots of pressure. The spots where the clamps press the wood on top will be carved away. Wood blocks or strips are used on the back to protect the wood from the clamps. After over 24 hours passed, the clamps are removed and carving can begin.