Posts

Showing posts with the label All Saints Christus Rex

All Saints Christus Rex - Finishing

Image
  With all the carving done the Christus Rex needs to be finished. This process involves a lot of step which we will look at with the photos below.  The carving is sealed with three coats of Enduro-Var. Enduro-Var is a water based finish that seals, strengthens and provide a slightly amber color to the basswood.  After the coats of Enduro-Var, the hands are glued in, and the carving is ready to be painted. The color we see here will provide the base color for the face, hands, and feet. Multiple coats of white acrylic are added for the alb and the whites of the eyes. The base brown color for the hair is then applied. Each color needs to dry before the next color goes on to avoid unnecessary blending.    Multiple coats of blue and are used for the chasuble and stole. Gold then goes on for the crown, halo, chasuble, and stole. A very faint touch of red is added to the face to give it a more lifelike appearance and a slightly lighter brown is dry brushed on the ha...

All Saints Christus Rex - Finishing the Cross

Image
  Here are some photos showing the finish process on the cross and the assembly of the cross with the processional staff.    First, a water based pre-stain was applied to the cross. Then, multiple coats of dark walnut stain were applied to get the right depth of color. After the stain, three coats of polycrylic are applied over the stain to protect the finish. The four carvings on the ends of the cross are painted white and gold. The frames of these carvings are also painted with gold.  After the base painting is done, three more coats of polycrylic are applied and then the same stain used on the cross is used to create shadows and greater definition to the carvings on the ends of the cross.   We designed a custom turned and cut staff head to connect the cross to a brass pole. Here is the staff head before any finish is applied.    The staff head was finished with the same dark walnut stain used for the cross and then three coats of polycrylic were app...

All Saints Christus Rex - The Cross

Image
   Here are some photos taken during the carving and assembly of the cross for the Christus Rex. The cross is made from poplar and will be stained dark before all is done to give a better contrast with the figure on the cross.   The vertical and cross bars are cut out and the ends cut to shape with a coping saw as shown in the last post . In this photo, I'm finishing she edges and surfaces with a hand scraper.   Lowering the background for the lamb carving on the left end of the cross bar.    Here is the nearly finished lamb carving.    Carving the chalice and host for the right side of the cross bar.    Now the dove is nearly done on the top of the vertical bar.   Carving the blessing had on the bottom of the cross.    With the carvings on the ends of the cross done, it is time to join the vertical and cross bars. I'm using a Japanese pull saw to make the cross cuts for the joinery.   The joint is cut and ready for a...

All Saints Christus Rex - Hands Fitted and Starting Cross

Image
  Since the last post on the Christus Rex for All Saints, a lot of work was done on refinements and the hands are finally fitted.    The carving of the figure is now close to its final form.    After ripping the cross members to width, I cut the shape of the ends with a good old fashion coping saw.      Here the cross bar is just resting on top of the vertical with the paper pattern of the figure so we can get an idea of how it will look after they are joined together.   More posts regarding this carving can be found on this site with the " All Saints Christus Rex " label. 

All Saints Christus Rex - Hands, Feet, and Crown

Image
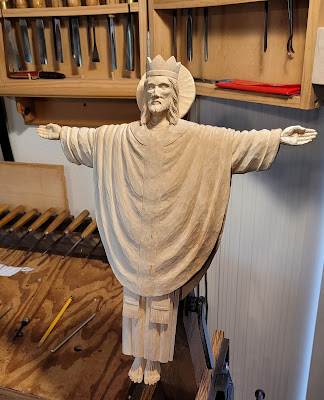
  Refining the hands, feet, crown, and halo of the Christus Rex carving for All Saints church.  Finishing up the feet with nail marks and added fringe to the end of the stole.    Finishing up the hands and preparing them to be inserted in the sleeves.   Refining the points of the crown and shaping the inside of the crown. Thinning and refining the shape of the halo. More posts regarding this carving can be found on this site with the " All Saints Christus Rex " label. 

All Saints Christus Rex - Face, Hair, and Hands

Image
Since the last post for the All Saints Christus Rex carving, some progress is made on head and hands. Refining the face.   Detailing in the hair and shaping the top of the crown.   Defining the palms and fingers of the hands. More posts regarding this carving can be found on this site with the " All Saints Christus Rex " label. 

All Saints Christus Rex - Forming the Face

Image
 Here are some photos of the continued work on the Cristus Rex for All Saints. Forming the face Giving some shape to major hair movements Starting to shape the hands More posts regarding this carving can be found on this site with the " All Saints Christus Rex " label. 

All Saints Christus Rex Roughing Out Figure

Image
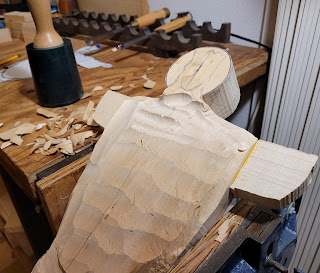
 Below are some photos taken while roughing out the figure for the All Saints Cristus Rex.   The major forms are defined. Roughing in the movements in the chasuble. I think we are getting a good idea of the form of things. More posts regarding this carving can be found on this site with the " All Saints Christus Rex " label.

All Saints Christus Rex Blocking Out

Image
   Here are some progress photos taken while blocking out the Cristus Rex carving:   Clamping the piece directly in the bench vise for the heaviest wood removal with mallet and gouges. Further blocking out on the bench (clamped with bench dogs and the bench vise.)  Now it is time to rough in some more refined forms. In order to have more control of the position of the carving, I'm attaching a threaded rod to the back that will allow me to attach the carving to an articulated arm. More posts regarding this carving can be found on this site with the " All Saints Christus Rex " label.  

All Saints Christus Rex Cut Out and Glue Up

Image
   Here are some progress photos for the Chritus Rex caving. Basswood cut out on a band saw for the body, arms and hands. The hands will be carved and inserted later to allow the wood grain to run the length of the fingers. This will give the fingers some added strength.   Prepping the surfaces to glue on the wood for the arms. This is done with a combination of hand plane and scrapers.   The arm sections are glued on. The glue must be clamped securely and allowed to dry and cure for at least 24 hours.   With the body and arms cut to shape and glued up, it is ready to start carving. Blog post regarding this carving will have the " All Saints Christus Rex " label.